Secret Sally Baking: Blueberry Scones Like A Pro Recipe!
Ever dream of effortlessly whipping up those bakery-worthy blueberry scones that practically melt in your mouth? Consider this your golden ticket to mastering the art of scone-making, transforming you from a novice to a scone-baking virtuoso. Were about to unlock the secrets to creating these delectable treats, revealing the professional techniques that will have everyone begging for your recipe.
Imagine the aroma of freshly baked scones, studded with juicy blueberries, filling your kitchen. This isnt just about following a recipe; its about understanding the nuances, the subtle shifts that elevate a simple scone to an extraordinary experience. We're going behind the scenes with baking expert Sally McKenney, whose dedication and passion have inspired millions to embrace the joy of baking. Well delve into her journey and uncover the meticulously crafted methods that make her blueberry scones truly exceptional. Prepare to be amazed by the simplicity and precision that define a truly masterful scone.
| Category | Information |
|---|---|
| Name | Sally McKenney |
| Profession | Professional Baker, Food Photographer, Cookbook Author |
| Specialty | Approachable Baking (Cakes, Cookies, Breads, etc.) |
| Community | Millions of loyal followers online |
| Website | Sally's Baking Addiction |
Let's talk ingredients. Not just any ingredients, but quality ingredients. This is paramount. Think of it like painting: the best canvas and paints yield the most stunning results. For our blueberry scones, were aiming for the Mona Lisa of baked goods. First, youll need: 2 1/4 cups flour (all-purpose works beautifully, but feel free to experiment!), 1/3 cup sugar (plus extra for that irresistible dusting), 1 tablespoon baking powder (the key to that perfect rise), 1 teaspoon salt (balances the sweetness), and 1/2 teaspoon ground ginger (a subtle warmth that elevates the flavor profile). Then, a secret weapon: zest from 1 lemon. This brightens the entire scone, adding a zesty zing that dances on your palate. Now, for the fats: 2 tablespoons cold butter, cut into pieces (cold is KEY more on that later!), and 2 tablespoons shortening (adds tenderness). The wet ingredients: 1 egg, 1/2 cup milk, 1/4 cup heavy cream (plus 1 tablespoon for brushing), and 1/2 teaspoon vanilla extract. And finally, the stars of the show: 1/2 cup fresh blueberries (or frozen, if you must, but handle them with care!).
- Vegamovies Hindi Dubbed Your Guide To Movies More
- Filmyfly Your Ultimate Guide To Bollywood Hollywood Streaming
Now, let's talk technique. This is where the magic truly happens. In a large bowl, whisk together the flour, sugar, baking powder, cinnamon (optional, but highly recommended!), and salt. This ensures even distribution of the leavening agents, crucial for a consistent rise. Next, the butter and shortening. This is where that "cold" mantra comes into play. Cold fats prevent the gluten in the flour from over-developing, resulting in a tender, flaky scone. Use a pastry blender or your fingertips to cut the butter and shortening into the dry ingredients until the mixture resembles coarse crumbs. Don't overwork it! Lumps of butter are your friend. They create those coveted pockets of air that make for a light and airy scone. In a separate bowl, whisk together the egg, milk, heavy cream, and vanilla extract. Gently pour this mixture into the dry ingredients, and stir until just combined. Again, don't overmix! A few streaks of flour are perfectly fine. Gently fold in the blueberries. Now, heres a pro tip: if using frozen blueberries, dont thaw them! Thawing will release their juices, turning your dough a murky purple and potentially making the scones soggy. Work quickly and gently to minimize bursting.
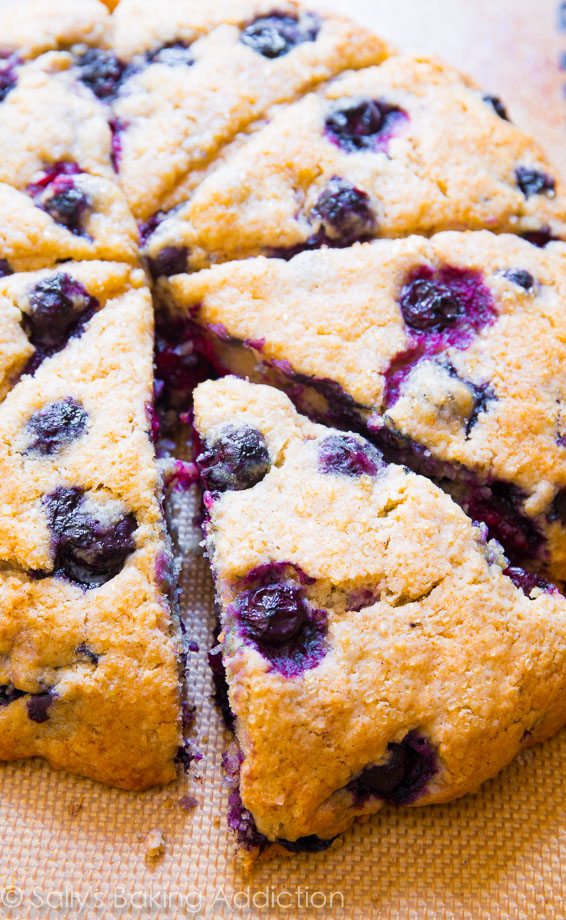
Turn the dough out onto a lightly floured surface. Gently pat it into a 1-inch thick circle. Use a sharp knife or a biscuit cutter to cut out your scones. For classic wedges, cut the circle into 8 equal pieces. For round scones, use a 2-inch biscuit cutter. Place the scones on a baking sheet lined with parchment paper or a silicone baking mat. This prevents sticking and ensures even baking. Brush the tops of the scones with the remaining 1 tablespoon of heavy cream. This creates a beautiful golden-brown crust. Sprinkle with a generous dusting of sugar. This adds a touch of sweetness and sparkle. Now, for the crucial chill: Place the scones on a plate or lined baking sheet (if your fridge has space!) and refrigerate for at least 15 minutes. This allows the gluten to relax and the butter to firm up, preventing the scones from spreading during baking. Meanwhile, preheat your oven to 400F (204C). This high temperature creates a burst of steam, helping the scones rise quickly and evenly. Bake for 18-20 minutes, or until the scones are golden brown and a toothpick inserted into the center comes out clean. Let them cool on the baking sheet for a few minutes before transferring to a wire rack to cool completely (or, let's be honest, devour them warm!).
Let's delve deeper into Sally McKenney's scone philosophy. Her success isnt just about following instructions; its about understanding the "why" behind each step. She emphasizes the importance of using cold ingredients. Cold butter, milk, and even sour cream (if you're feeling adventurous and adding a dollop to the wet ingredients) are essential for creating flaky layers. The cold fat prevents the gluten from over-developing, resulting in a tender crumb. Think of it like puff pastry: the cold butter creates layers of steam, which separate the dough and create that signature flakiness. McKenney also stresses the importance of chilling the scones before baking. This allows the gluten to relax, preventing the scones from spreading and losing their shape. It also allows the butter to solidify, further contributing to the flaky texture. This is especially important on warmer days. Don't skip this step!
McKenney's approach to baking is rooted in approachability. She understands that baking can be intimidating, especially for beginners. That's why she breaks down complex recipes into simple, easy-to-follow steps. She provides clear explanations and helpful tips, empowering home bakers to create delicious treats with confidence. Her philosophy is all about making baking accessible to everyone, regardless of their skill level. She encourages experimentation and creativity, urging bakers to adapt recipes to their own preferences and tastes. It's about finding the joy in baking, not just following a set of rules. She built her loyal following by creating a warm, supportive online community where bakers can share their successes, ask questions, and learn from each other. It's a testament to her passion for baking and her commitment to helping others discover the joy of creating delicious food.
Want to get ahead? These scones are incredibly make-ahead friendly. To make them ahead, you can shape them, freeze them on a baking sheet, and then bake them directly from frozen, adding a few extra minutes to the baking time. This is a great option for busy mornings or unexpected guests. Alternatively, you can shape and refrigerate the scones for up to 24 hours before baking. This is a good option if you want to have fresh scones ready for breakfast without having to get up too early. Finally, you can bake the scones completely, then cool and freeze them. To thaw, simply leave them at room temperature for a few hours, or warm them in a low oven. They won't be quite as perfect as freshly baked scones, but they'll still be delicious. When freezing baked scones, wrap them tightly in plastic wrap or aluminum foil to prevent freezer burn. They will keep for up to 2 months in the freezer.
Now, lets address some common mistakes. Overmixing is a cardinal sin in scone-making. It develops the gluten, resulting in tough, dense scones. Mix the wet and dry ingredients until just combined, leaving a few streaks of flour. Lumps are your friend! Another common mistake is using warm butter. Warm butter will melt into the flour, preventing the formation of those flaky layers. Make sure your butter is cold and cut into small pieces. Avoid thawing frozen blueberries before adding them to the dough. Thawing will release their juices, turning the dough purple and potentially making the scones soggy. If you absolutely must use frozen blueberries, toss them with a tablespoon of flour before adding them to the dough to help absorb any excess moisture. Finally, don't overcrowd the baking sheet. Overcrowding will prevent the scones from browning evenly. Bake in batches if necessary.
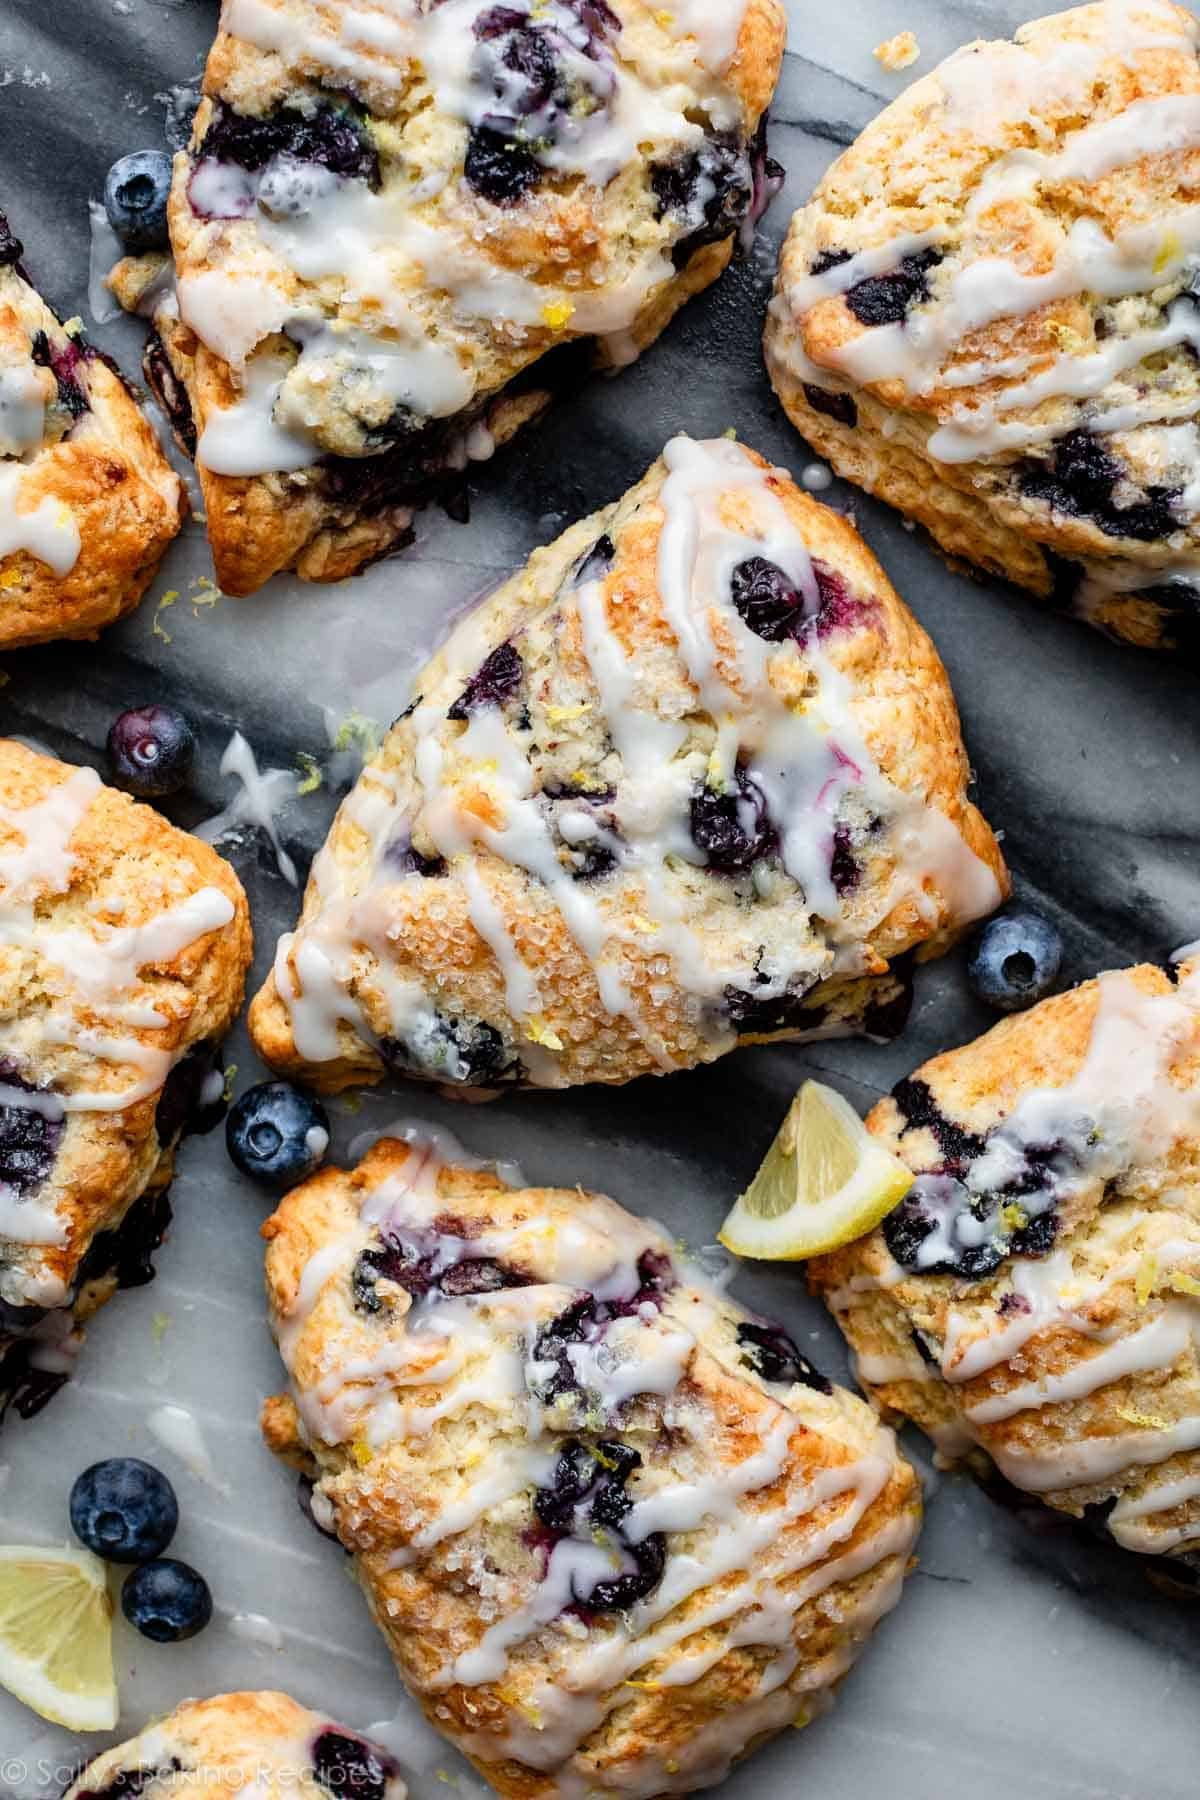
What about variations? The possibilities are endless! Feel free to experiment with different fruits, spices, and add-ins. For a lemon poppy seed scone, add 1 tablespoon of poppy seeds and the zest of 2 lemons to the dry ingredients. For a cranberry orange scone, add 1/2 cup of dried cranberries and the zest of 1 orange to the dry ingredients. For a chocolate chip scone, add 1/2 cup of chocolate chips to the dry ingredients. You can also experiment with different types of flour. Whole wheat flour will give the scones a slightly nutty flavor and a denser texture. Spelt flour is another great option. You can also add nuts, such as walnuts, pecans, or almonds. Just be sure to chop them finely before adding them to the dough. And dont be afraid to get creative with the glaze. A simple powdered sugar glaze is always a good option, but you can also add lemon juice, orange juice, or even coffee to the glaze for extra flavor. These small touches can bring amazing changes to taste.
A crucial tip to remember is that baking is both an art and a science. While precise measurements are important, dont be afraid to trust your instincts. If the dough seems too dry, add a little more milk. If it seems too wet, add a little more flour. The key is to pay attention to the texture of the dough and adjust accordingly. The perfect scone is one that is light, airy, and bursting with flavor. Its a treat that can be enjoyed any time of day, with a cup of coffee, tea, or even a glass of milk. With a little practice and a few simple techniques, you can bake delicious blueberry scones like a pro. So, grab your ingredients, preheat your oven, and get ready to embark on a scone-baking adventure! Your journey to becoming a scone master starts now. You'll be baking delicious blueberry scones like a pro.
So here is the recap of the key to success: using quality ingredients, mastering the techniques, and avoiding common mistakes. Now it's your turn to give it a try. Whether you're looking to bake for family gatherings, a cozy brunch, or even a business venture, this article will equip you with everything you need to know. Theres nothing quite like the smell of freshly baked scones wafting through the air. Sally, our baking queen, has been crafting these little blueberry masterpieces for years, and today, were diving deep into her delicious secrets. If you've ever wondered how to bake blueberry scones like a pro, you're in the right place.
Secrets to perfect blueberry scones: Make sure the butter, milk and sour cream are cold. This will prevent the butter from melting and keep the scones nice and fluffy, instead of heavy and dense. Chill the scones before baking to help them retain their shape better when baking; Do not thaw the berries if using frozen to prevent the juices from releasing into the dough. Delicious secrets to Sally baking scones blueberry like a pro!
- Anjali Aroras Ordeal Can She Recover The Deepfake Impact
- Movierulz Kannada 2025 The Truth About Movie Downloads Legal Ways
My Favorite Blueberry Scones. Sallys Baking Addiction
Summer Sally's Baking Addiction

My favorite blueberry scones sally s baking addiction Artofit
